Sequencing and Targeting
Our SDK enables you to display relevant intercepts to specific users at optimal moments, ensuring your messages reach the right audience when it matters most. To achieve this, we utilize Targeting to filter users based on their attributes (such as membership level or purchase count), and Sequencing to display intercepts only after users complete specific actions in a defined order (such as entering the cart screen or leaving a review for a product).
Targeting
Targeting is a rule-based system that controls when intercepts appear to users. It lets you create conditions using custom properties (like membership level), operators (like "equals" or "greater than"), and specific values. You can combine multiple rules with AND/OR logic to build precise targeting criteria.
Setup Guide
-
Select an intercept from your intercepts list.
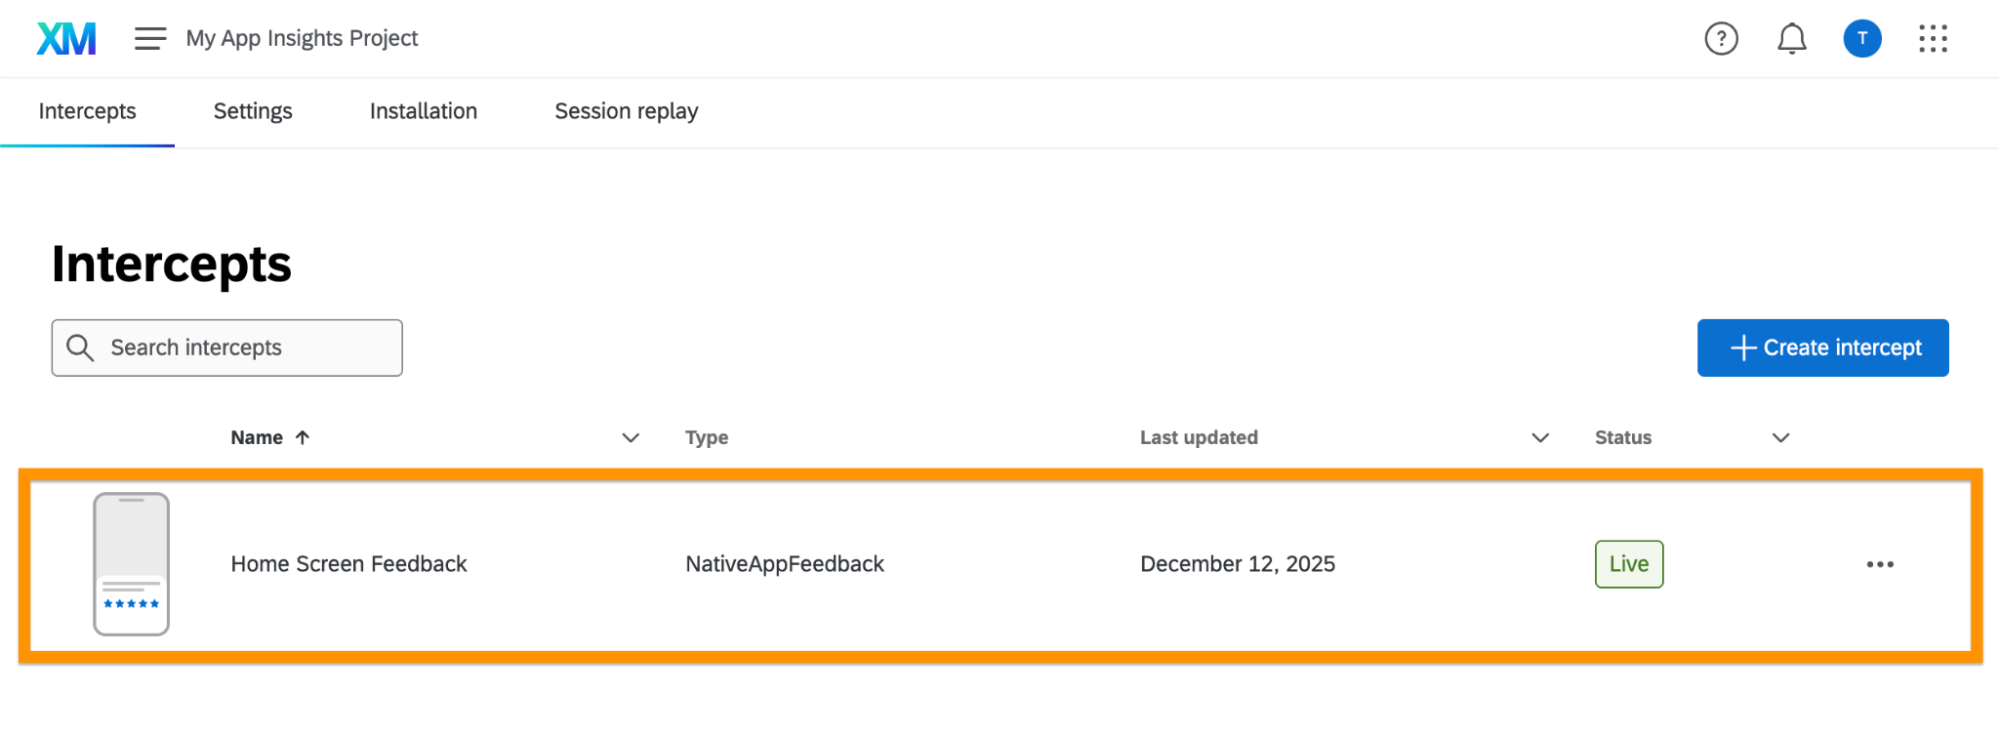
-
Click the Add Targeting Logic button in the Targeting Logic card.
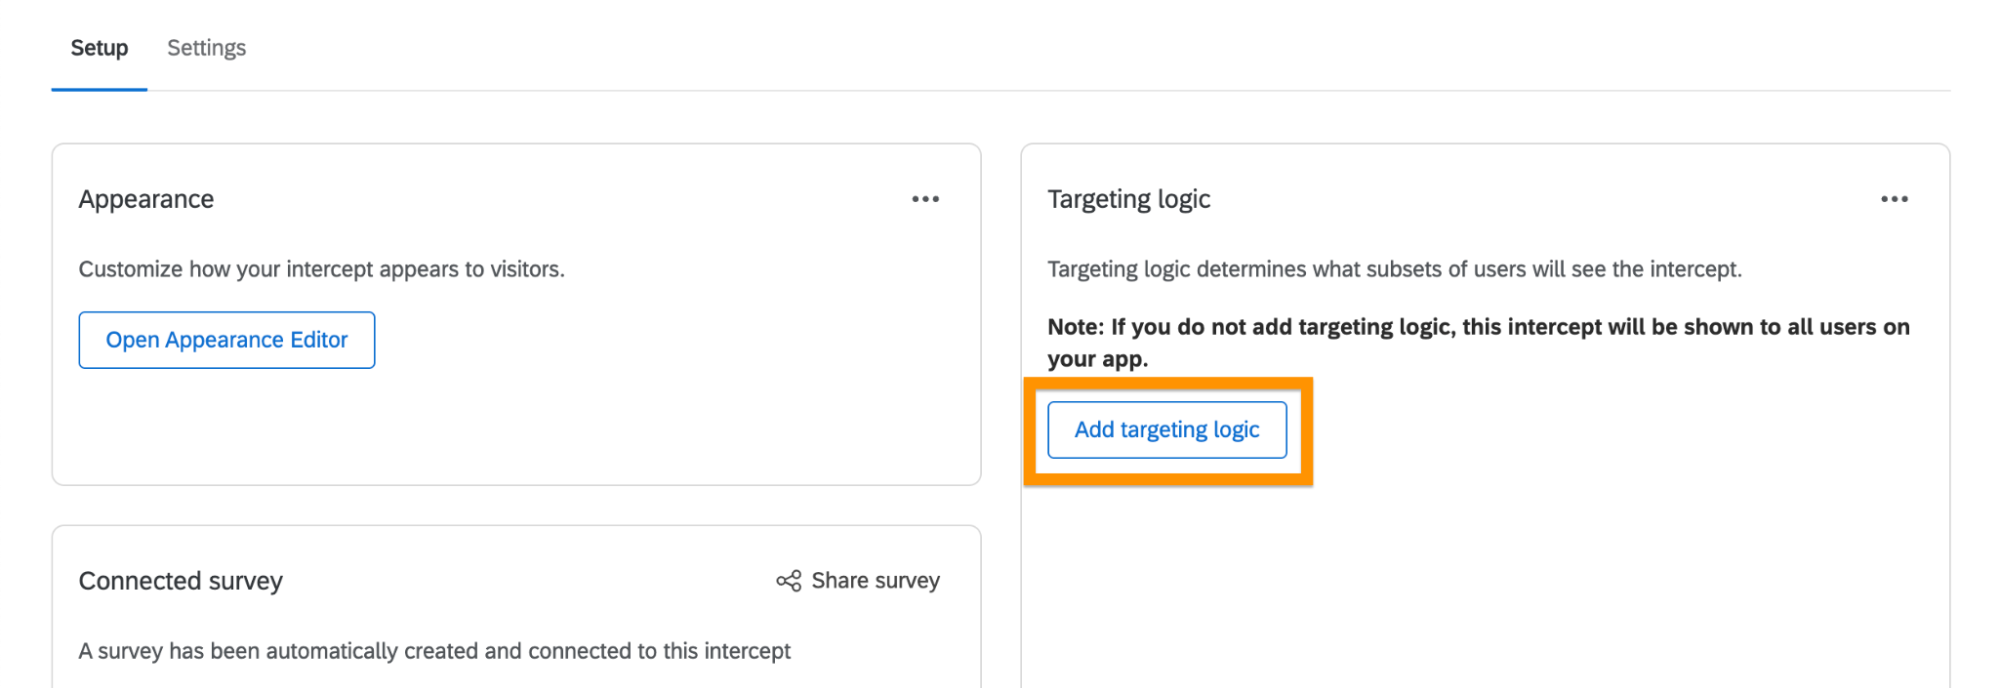
-
A modal will appear, click Add Condition.
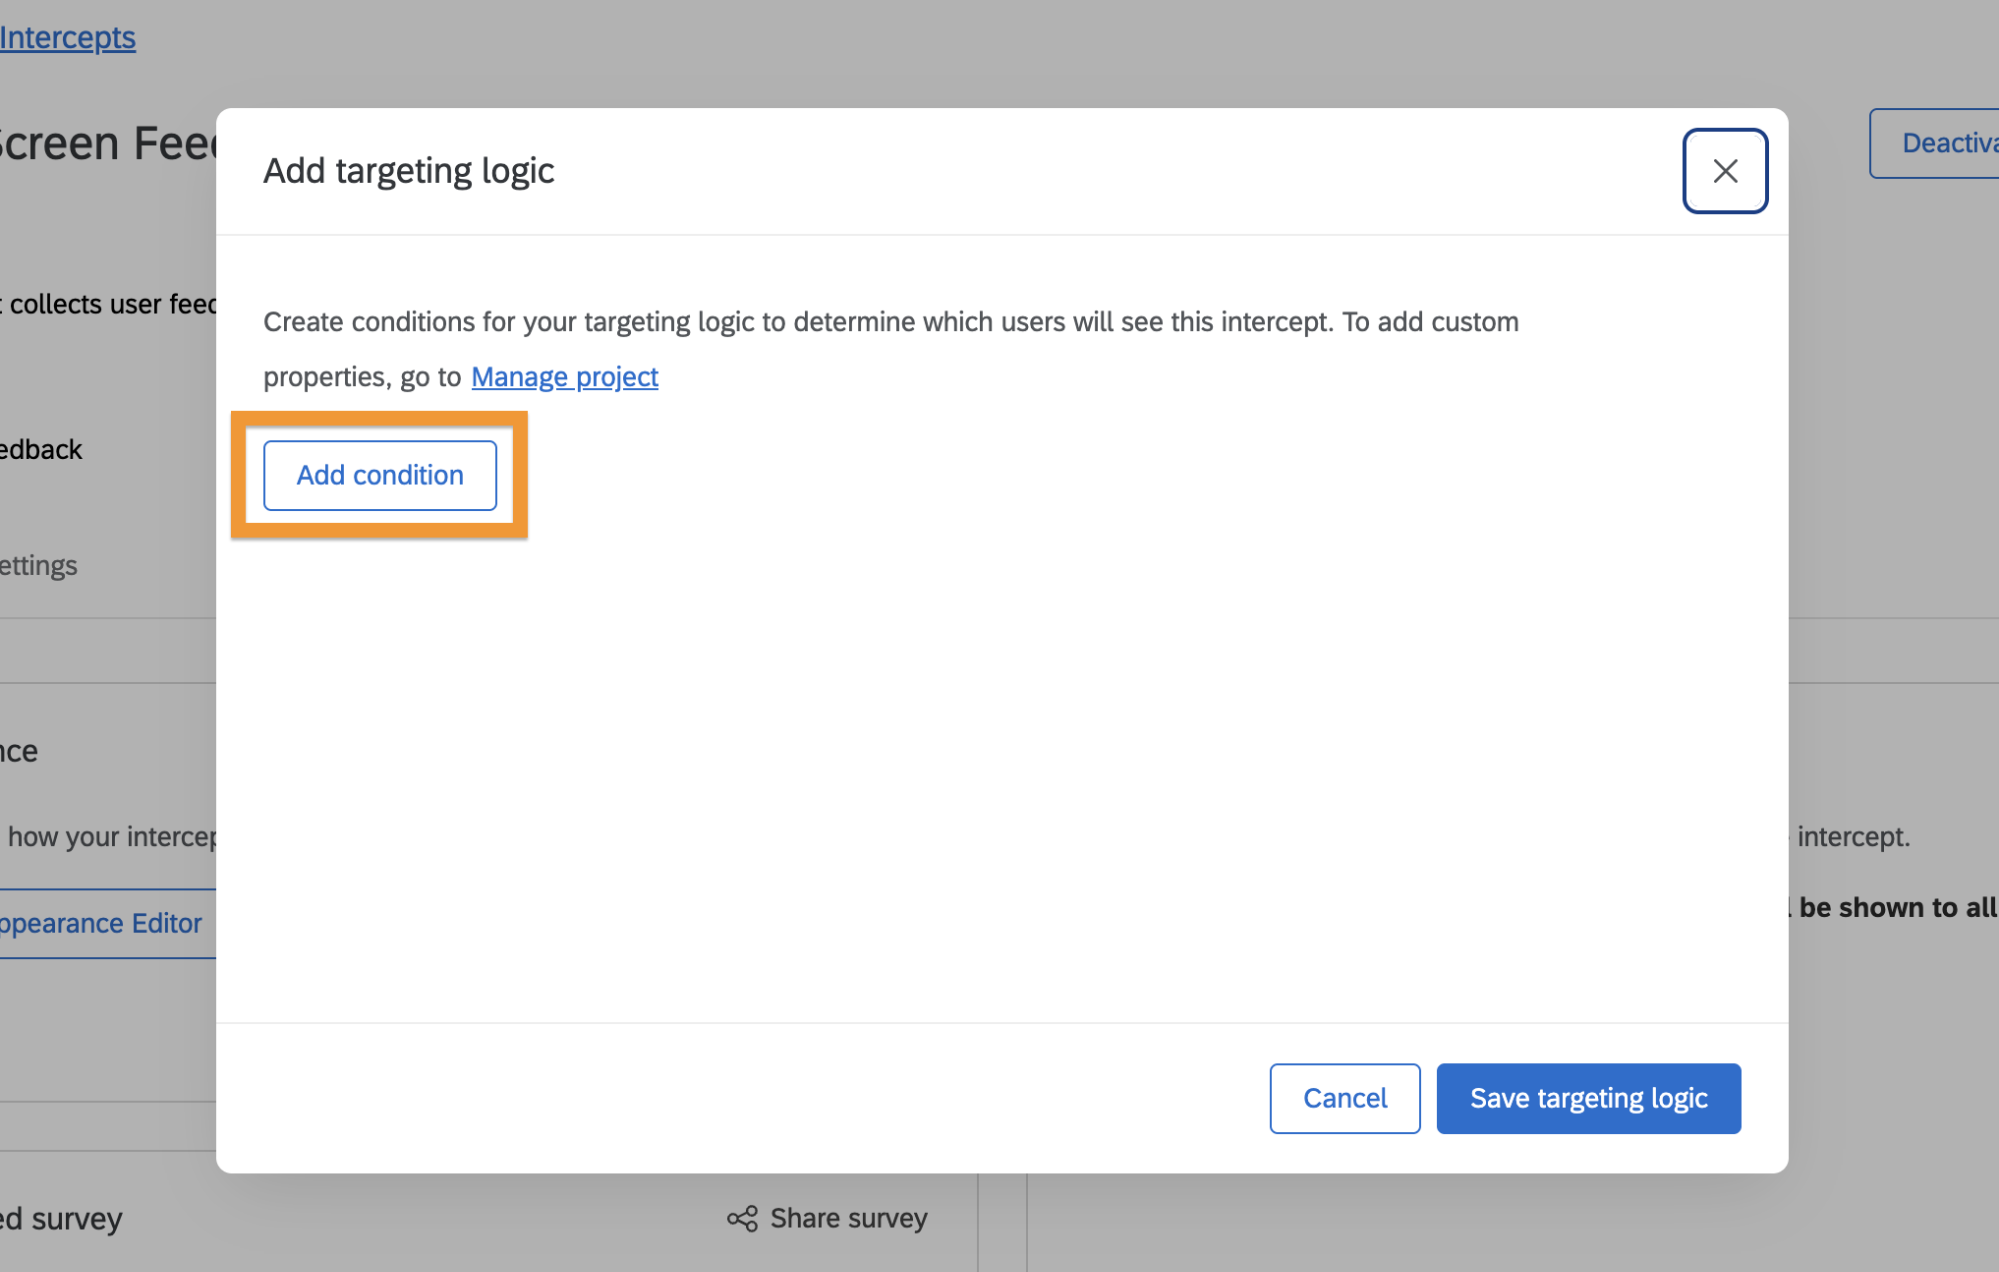
-
Build your targeting logic:
- Select a custom property you added to your project (including Date/Time properties for time-based targeting).
- Choose an operator IS / IS NOT and enter the value.
- Add multiple conditions within a block using AND / OR connectors.
- To expand beyond one block, use AND IF / OR IF for more complex logic.
- When finished, click Save targeting logic to apply your changes.
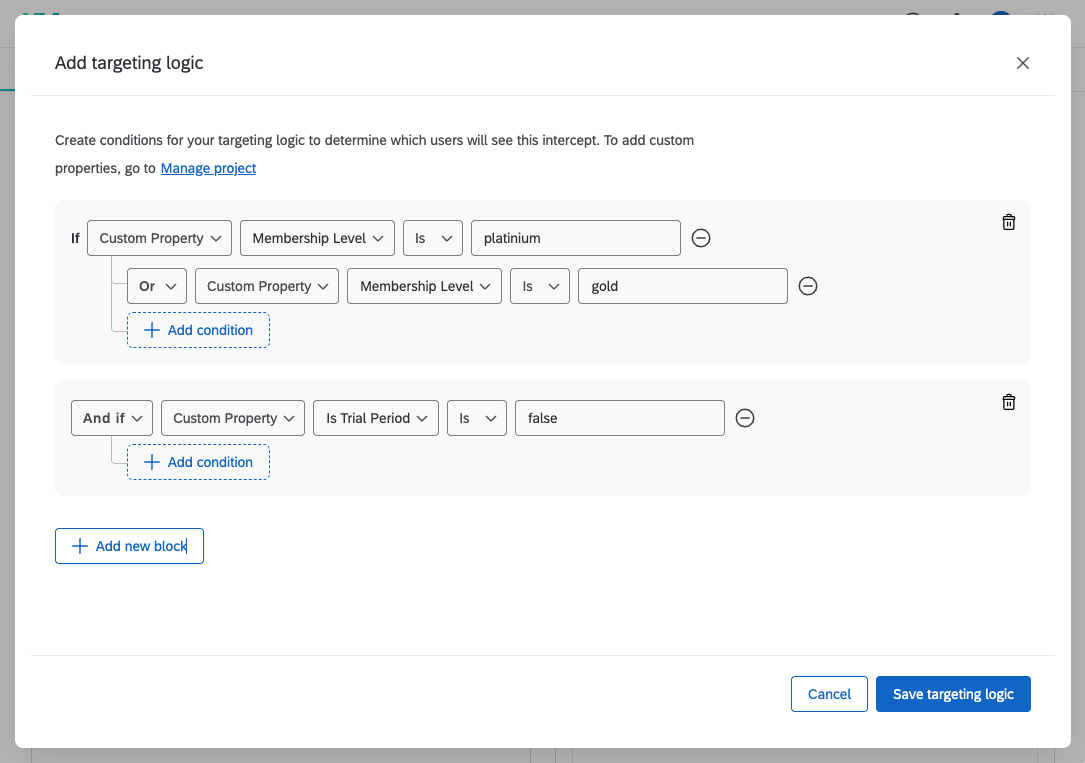
-
After saving, your targeting logic will appear in the Targeting Logic card.
Sequencing
Sequencing allows you to configure the intercept to appear based on a series of events. It lets you define a sequence of events or conditions that must happen consecutively, ensuring intercepts display only after users complete each required step in your defined flow.
Available sequencing behaviors include:
| Behavior | Description | SDK requirement |
|---|---|---|
| Enters screen | User navigates to a screen with a given name. | Screen name is reported automatically (Auto Capture) or via Manual Screen Changes. |
| Custom event | A named custom event is triggered. | Use Custom Events to report events from your code. |
| Taps button | User taps a button with a given identifier. | Button tap is captured automatically (Button Auto Capture) or via Manual Button Taps. |
Setup Guide
-
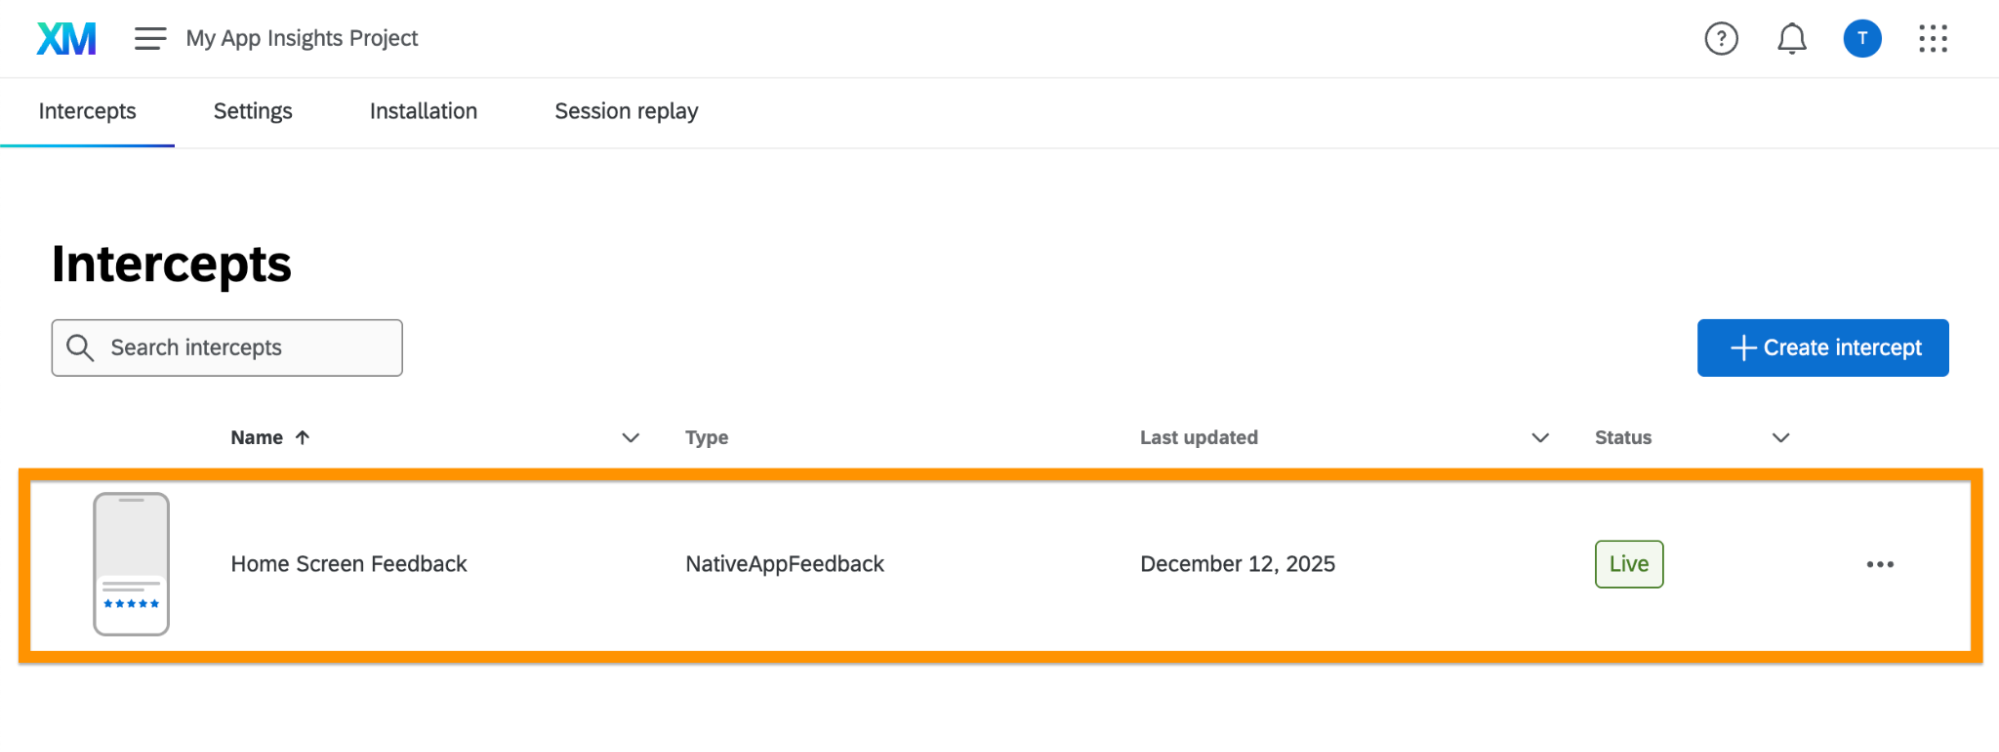
Select an intercept from your intercepts list.
-
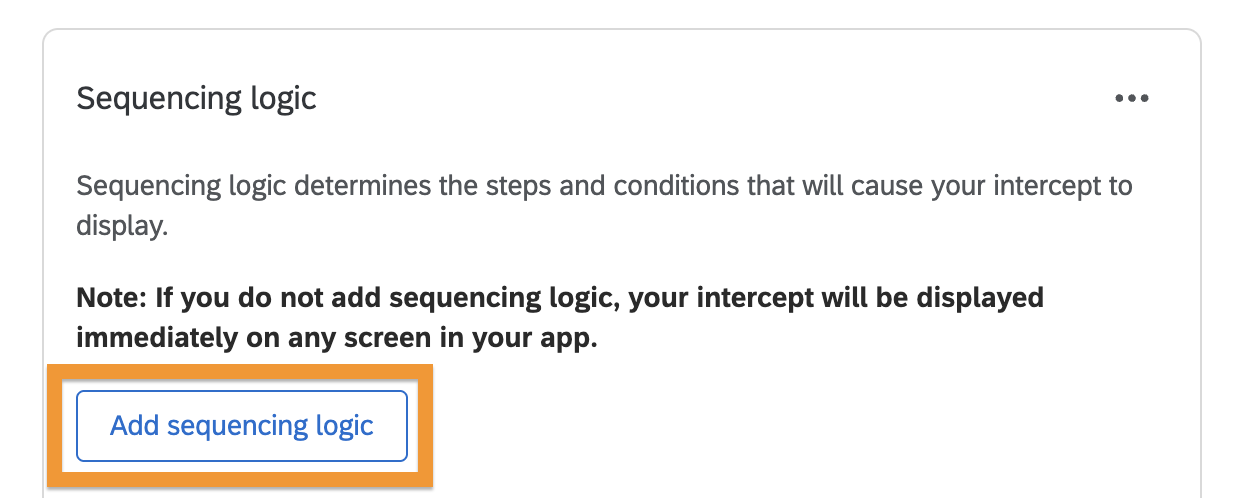
Click the Add Sequencing Logic button in the Sequencing Logic card.
-
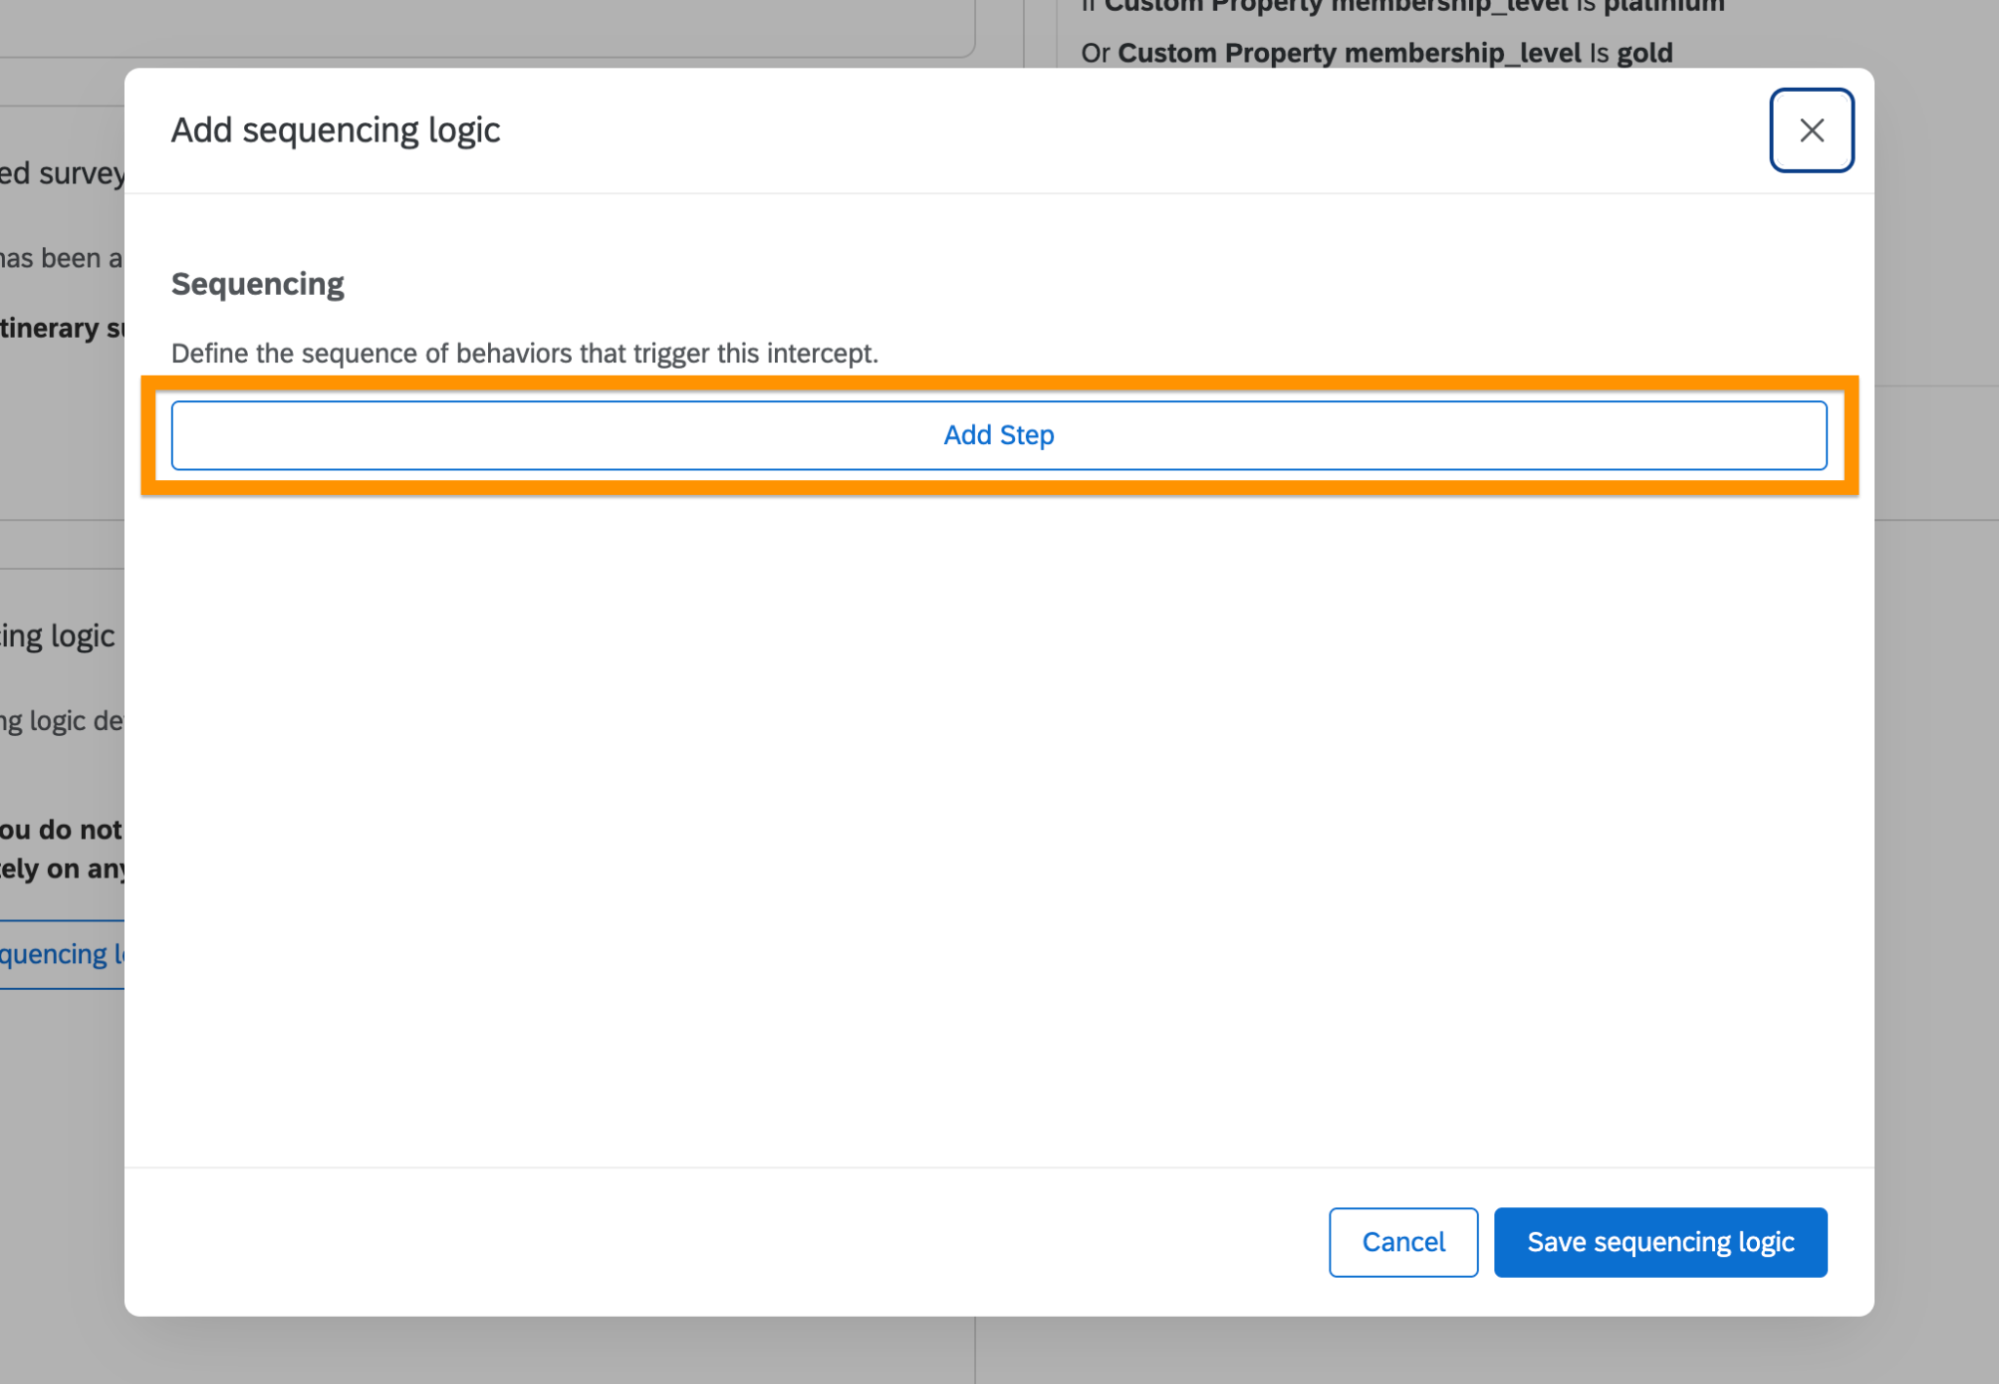
A modal will appear, click Add Step.
-
Build your sequencing logic:
- Select a behavior, e.g. "Enters screen", "Custom event", or "Taps button".
- For screen changes, specify the screen name; for custom events, provide an event name; for button taps, provide the button identifier.
- Use AND / OR connectors to add multiple conditions within a step.
- Click Add behavior to include additional behaviors to screen conditions.
- Click Save sequencing logic to apply your configuration.
-
After saving, your sequencing logic will appear in the Sequencing Logic card.